How to Knit Bobbles: Step-by-Step Tutorial
How to Knit Bobbles: Step-by-Step Tutorial
Bobbles are like bubbles or puffs in your knitting. These little puffs are perfect for adding texture to any knitting project. Add a few, or a lot - It's up to you! Creating bobbles is much easier than you think. Here a step-by step guide on how to construct a basic bobble. Bobbles aren't difficult when you know how and even a beginner with just a little experience can make them.
Here are the skills needed to create a bobble:
Knit front & back
Passing a stitch over
Let's Get Started Knitting Bobbles
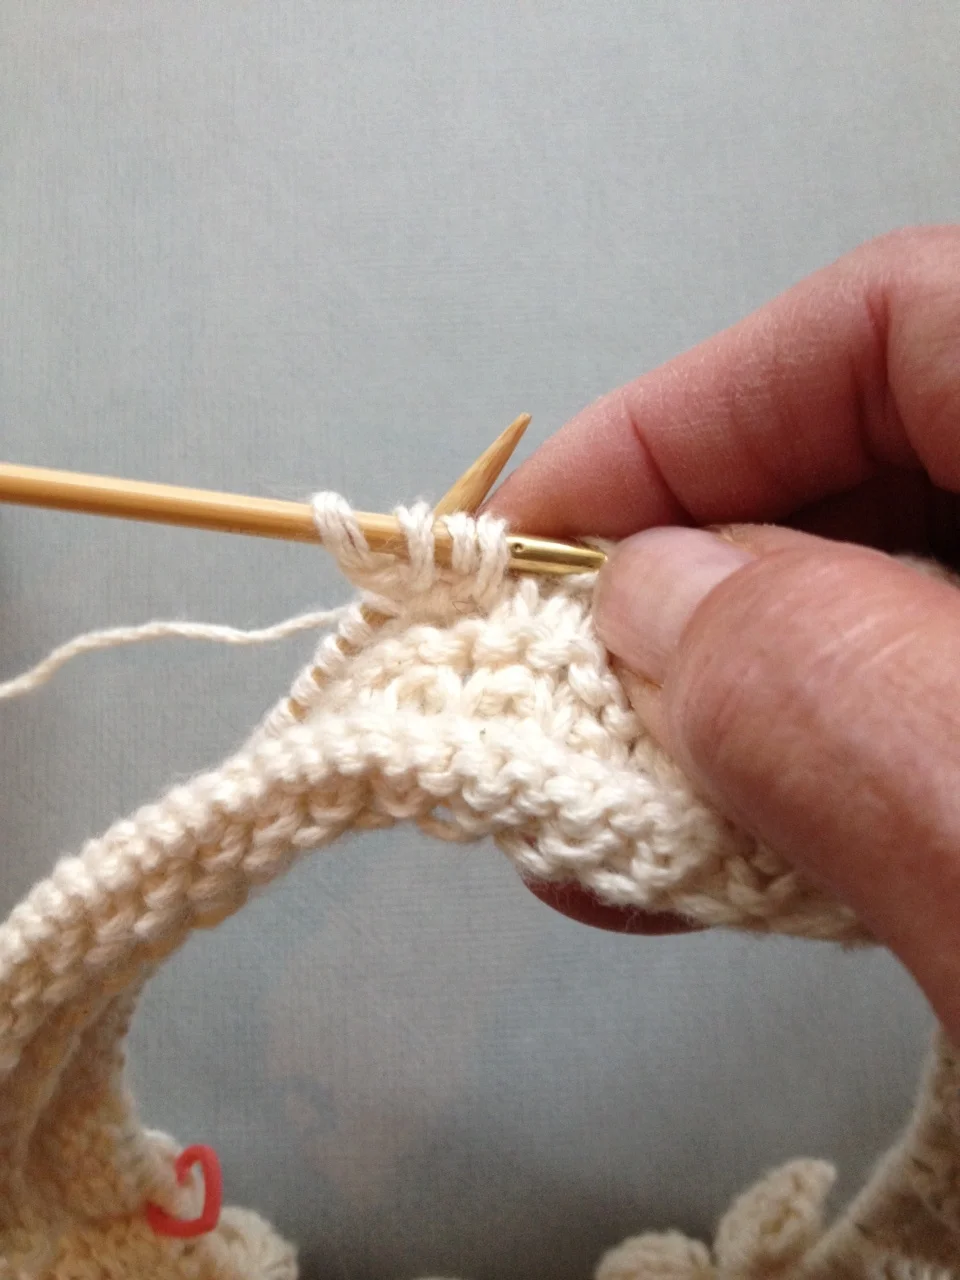
Forming The Foundation (see images above)
Knit into the front of the stitch - do not remove from needle.
Knit into the back of the stitch - again keeping the stitch on the needle.
Repeat these 2 steps once more - 4 stitches on the left hand needle.
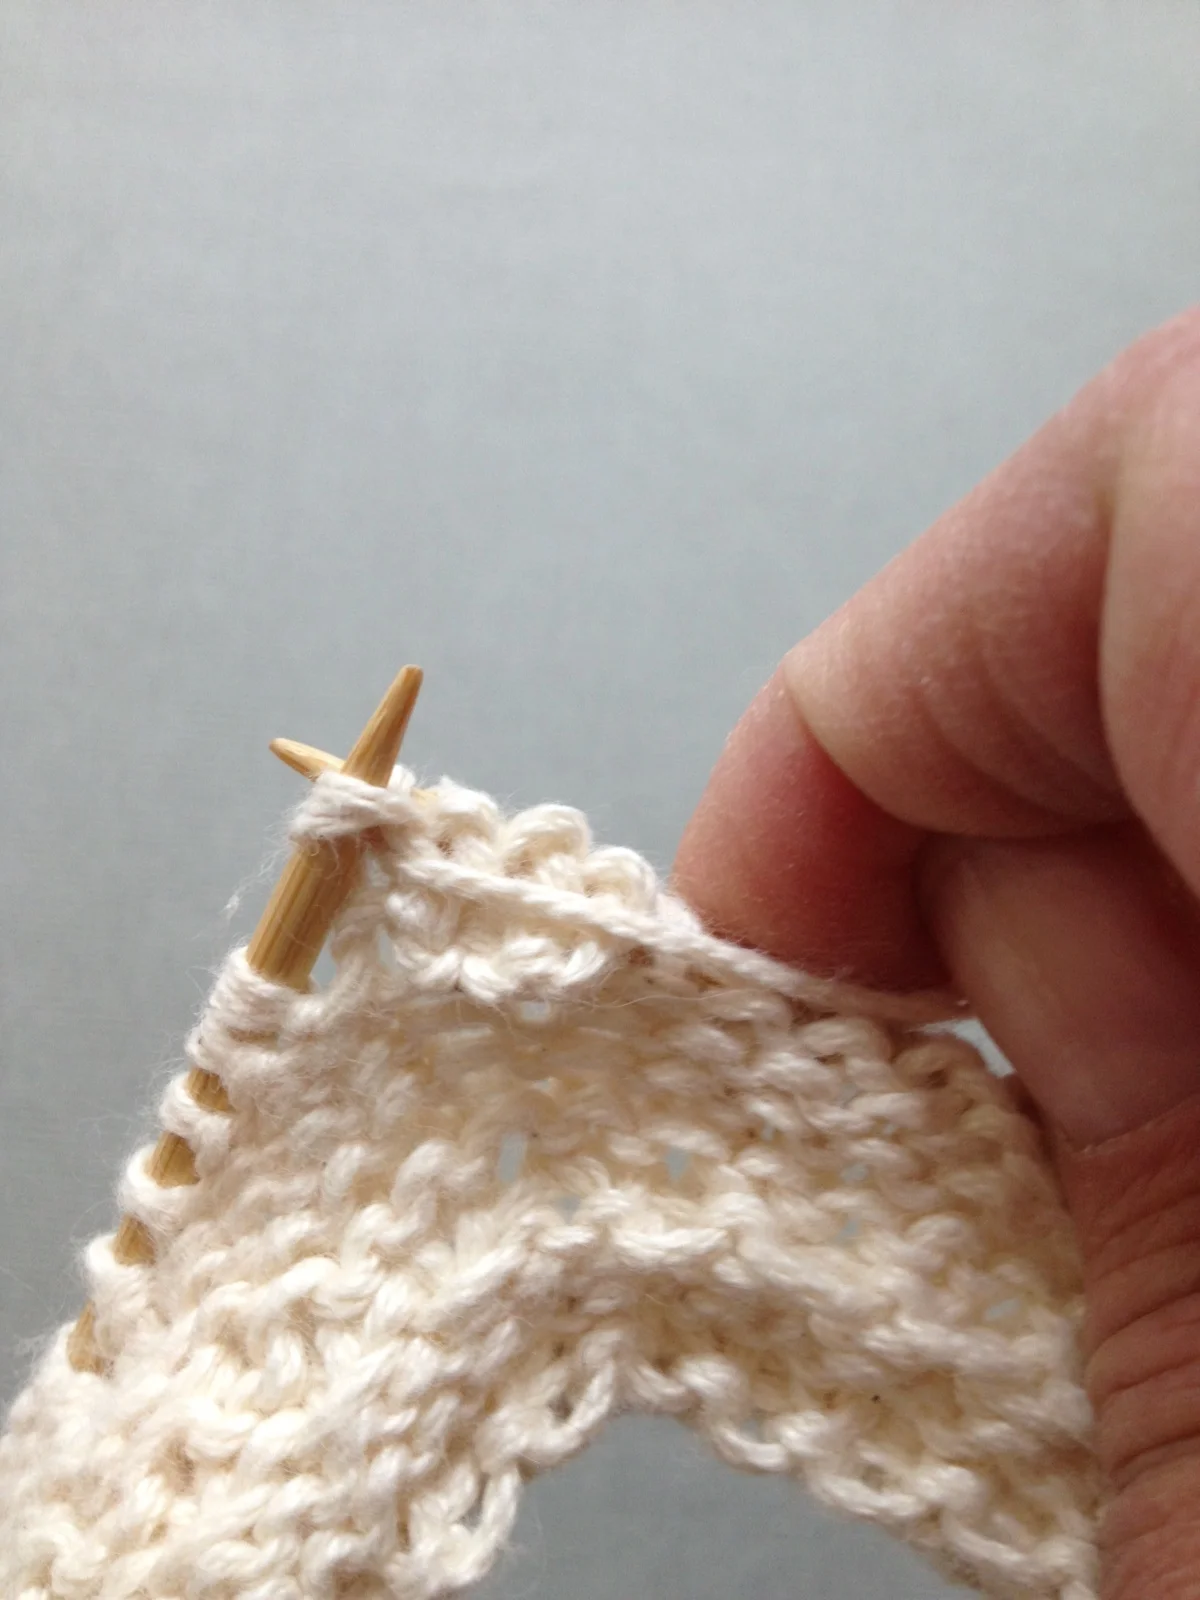


Working The Bobble (see images above)
Turn work, purl across the 4 stitches.
Turn work, knit across the 4 stitches.
Repeat these 2 steps twice (2x) more. Your bobble will look like this (step 3 image).
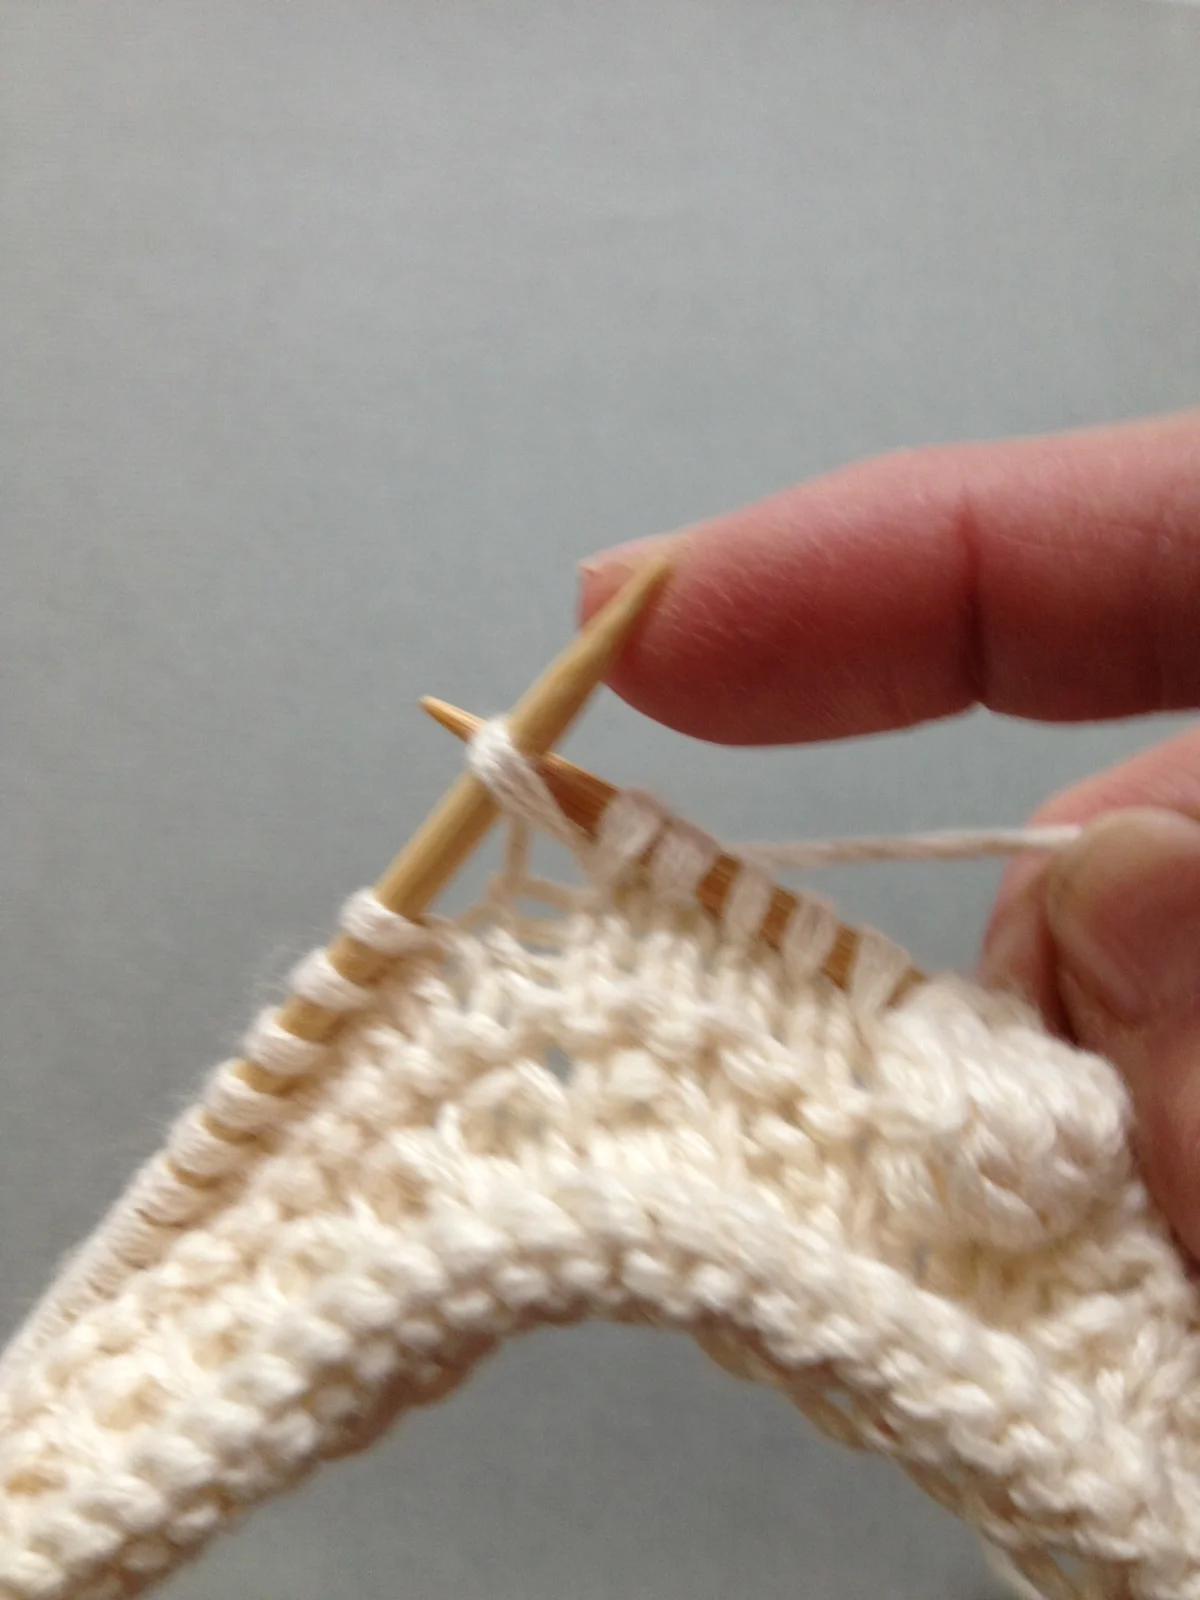
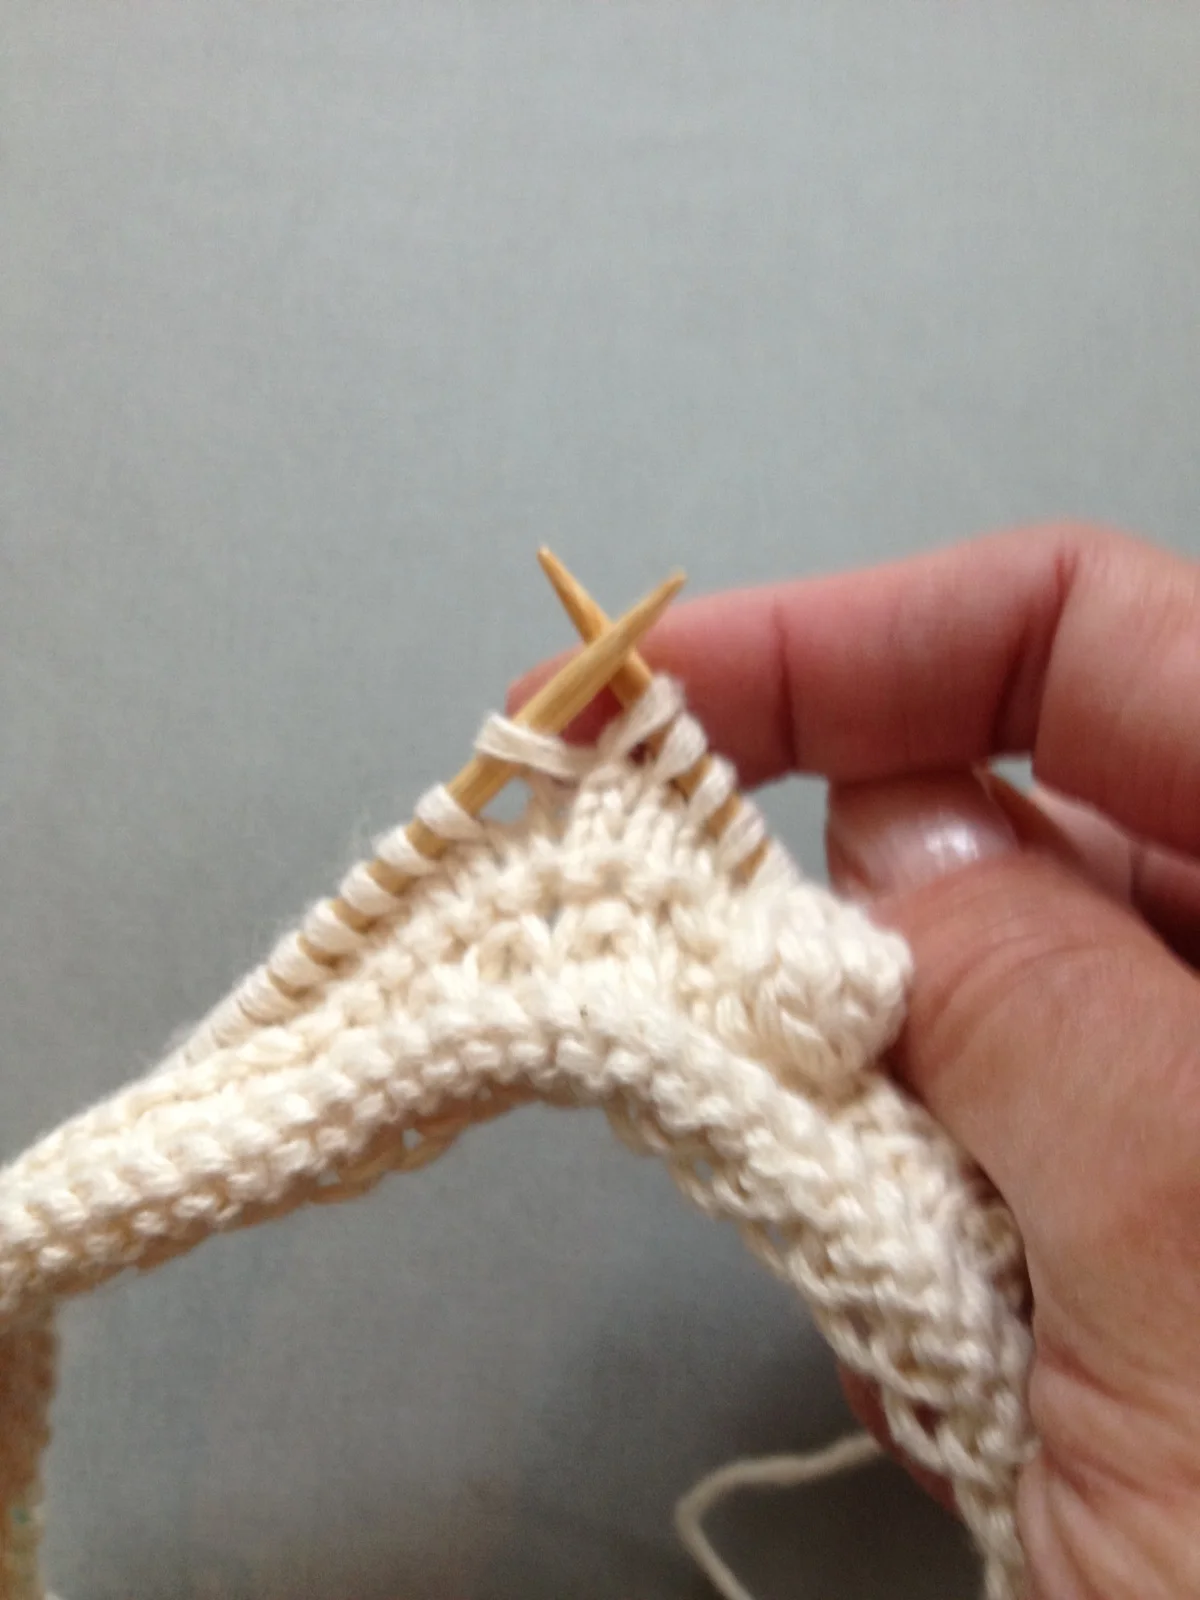
Shaping And Finishing
Completing and shaping the top of the bobble is nothing more than passing the stitches one by one over the adjacent stitch and off the needle.
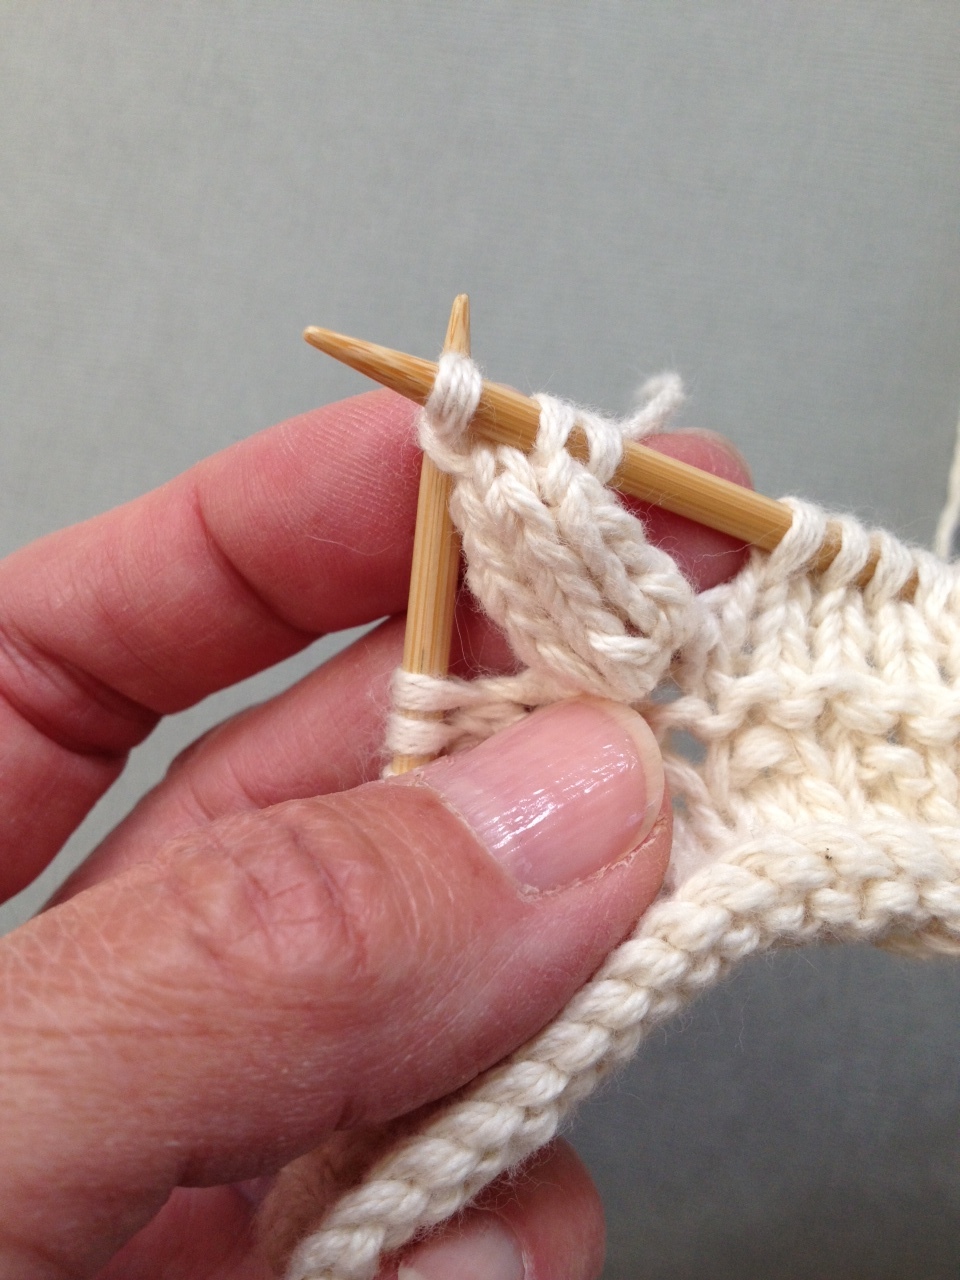
Start with the stitch to the right of the last stitch worked (the stitch with the working yarn attached). With the left needle tip lift this stitch over last stitch and off the needle.
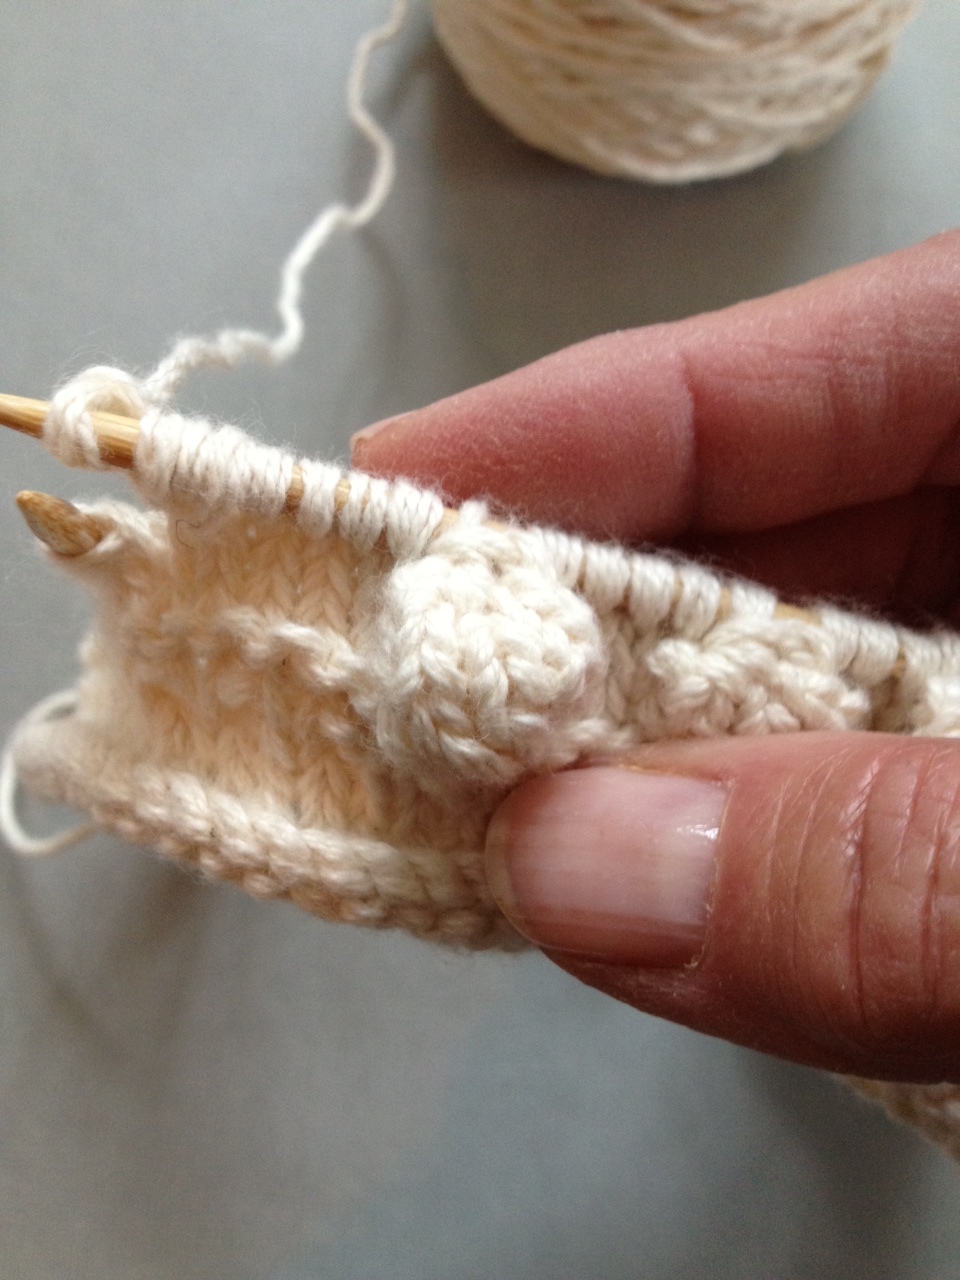
Continue this process until 1 stitch remains. Bobble Complete!
Now, go add some bobbles to your knitting!
Have you ever tried knitting bobbles? What was the knitting project you worked on that had bobbles in it?
- Donna, Your friendly Knitting Doctor


